> ## Documentation Index
> Fetch the complete documentation index at: https://support.myapps.ai/llms.txt
> Use this file to discover all available pages before exploring further.
# Tracing & Stencils
> Practice with built-in guides, convert photos on-device, or generate a custom traceable stencil.
Open **Stencil Studio** from the pencil-and-outline control or choose **Layers → Add → Tracing Stencil**.
## Built-in guides
Pixio Canvas includes 28 skill-building guides across animals, nature, people, objects, vehicles, and imagination. Search by subject or skill, filter by category, and use the difficulty indicators to move from simple contours to more advanced forms.
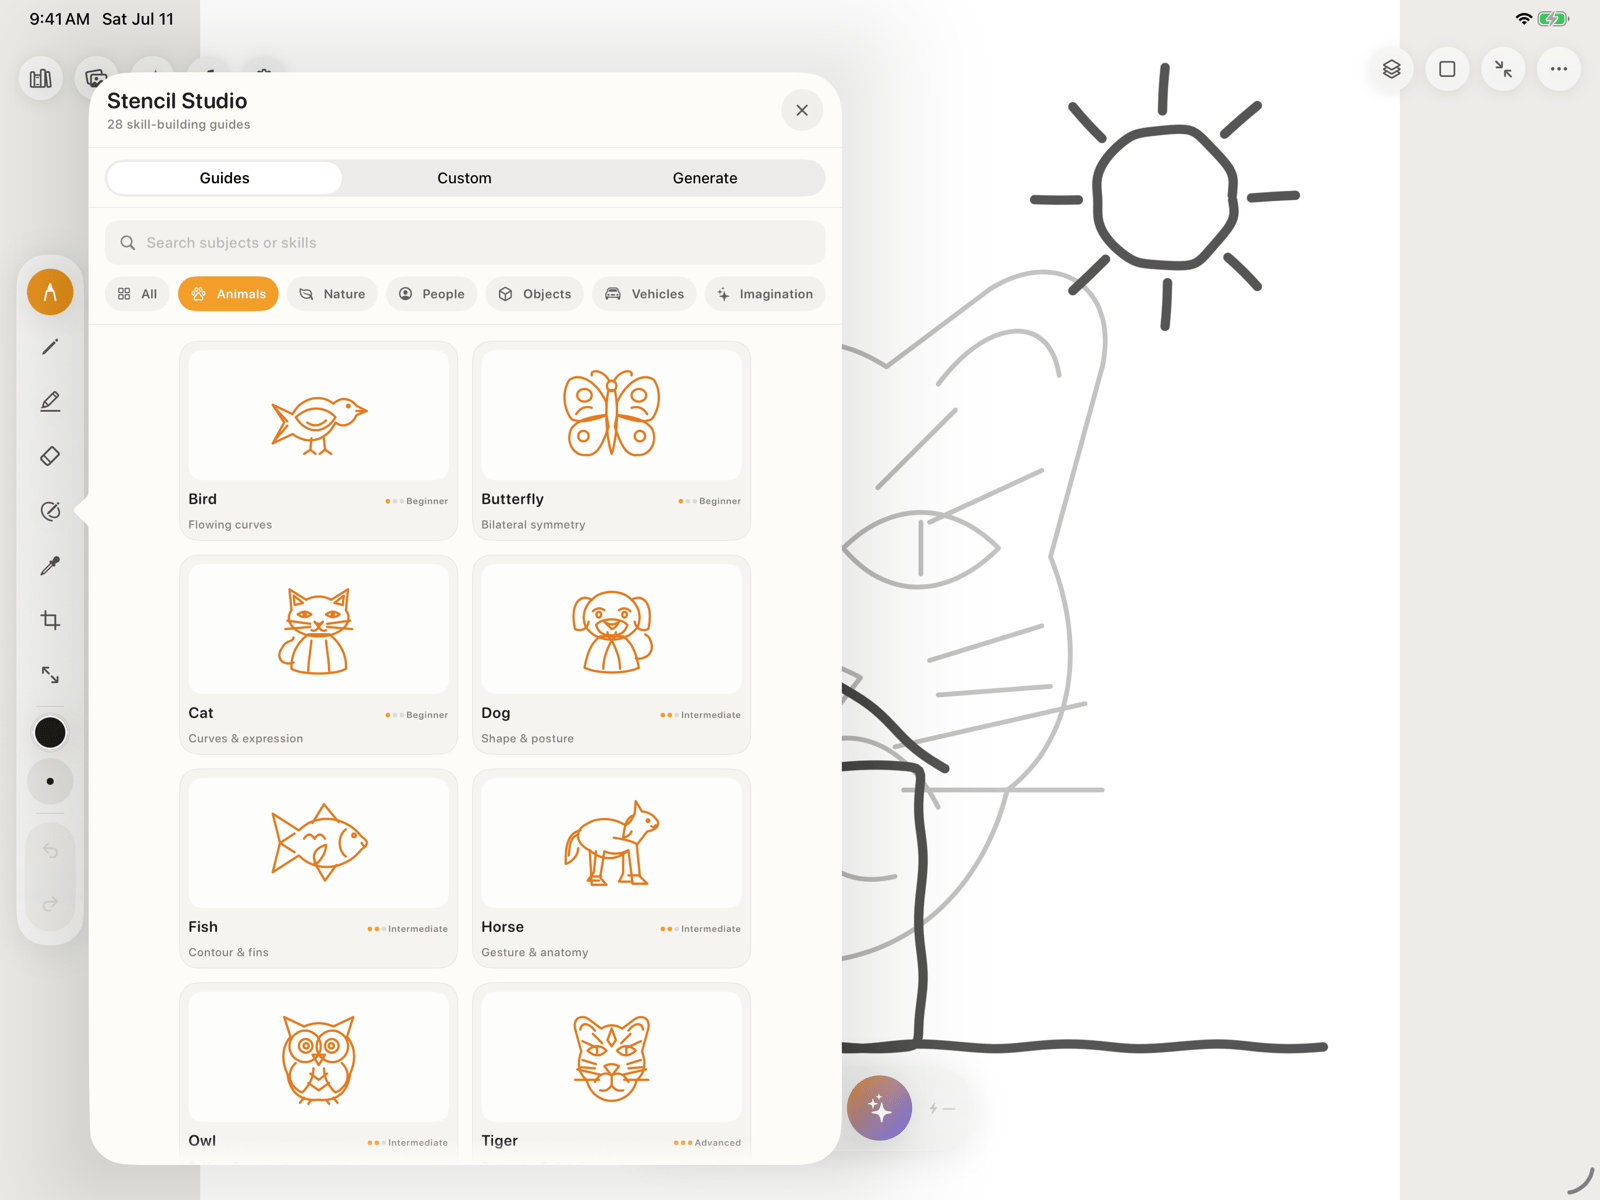 Open **Guides**, search or filter the catalog, then tap a stencil.
Move, resize, and rotate the guide until it fits your composition.
Make the linework faint enough to trace comfortably.
Keep the guide locked beneath your drawing layer so your marks remain independently editable.
When the tracing is complete, turn off the guide's visibility or remove only that layer.
## Photo-to-Stencil on this iPad
Use **Custom → Upload Photo** to convert a selected image into clean black-and-white tracing lines. This conversion runs on-device and does not use Pixio AI or credits.
Open **Guides**, search or filter the catalog, then tap a stencil.
Move, resize, and rotate the guide until it fits your composition.
Make the linework faint enough to trace comfortably.
Keep the guide locked beneath your drawing layer so your marks remain independently editable.
When the tracing is complete, turn off the guide's visibility or remove only that layer.
## Photo-to-Stencil on this iPad
Use **Custom → Upload Photo** to convert a selected image into clean black-and-white tracing lines. This conversion runs on-device and does not use Pixio AI or credits.
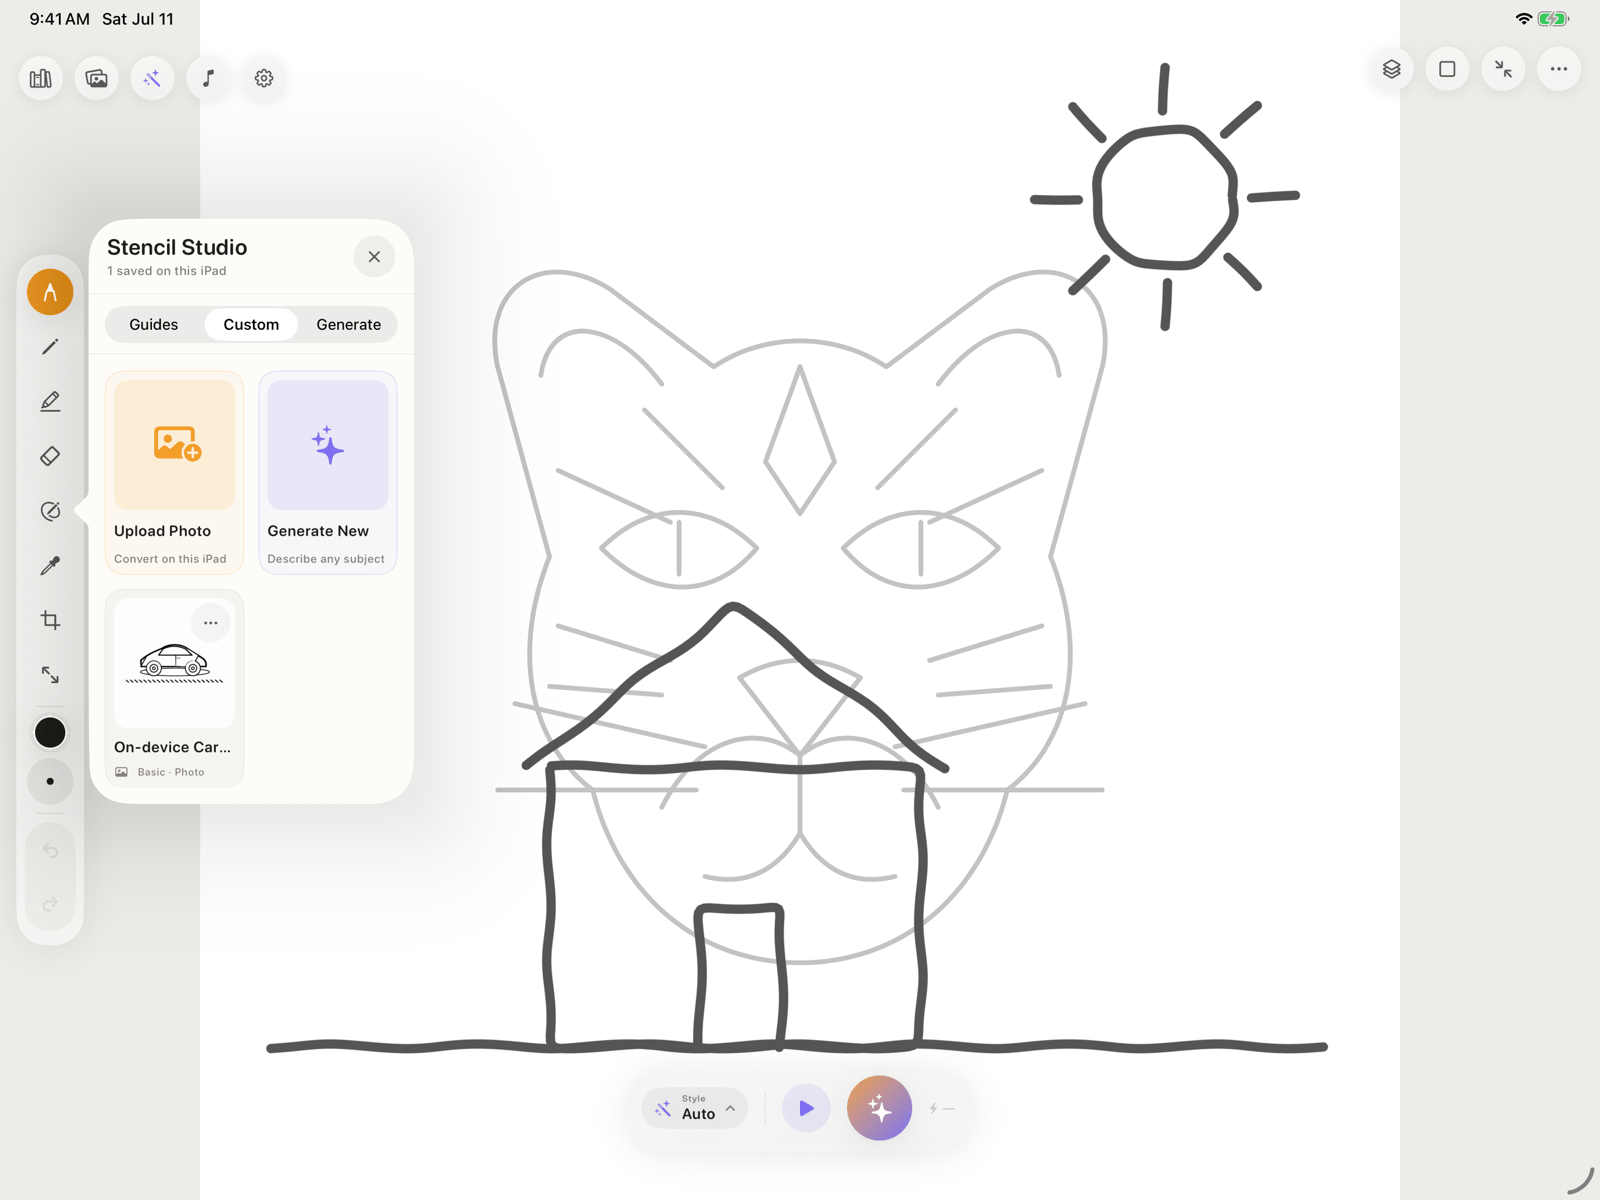 For the clearest result, choose a well-lit image with a distinct subject, simple background, and visible edges. Select **Basic** for essential outlines or **Advanced** for more detail. Name the finished result and save it in **Custom Stencils** for reuse.
## Generate Stencil with Pixio
Open **Generate**, describe what you want to trace, choose **Basic** or **Advanced**, then tap **Generate Stencil**.
For the clearest result, choose a well-lit image with a distinct subject, simple background, and visible edges. Select **Basic** for essential outlines or **Advanced** for more detail. Name the finished result and save it in **Custom Stencils** for reuse.
## Generate Stencil with Pixio
Open **Generate**, describe what you want to trace, choose **Basic** or **Advanced**, then tap **Generate Stencil**.
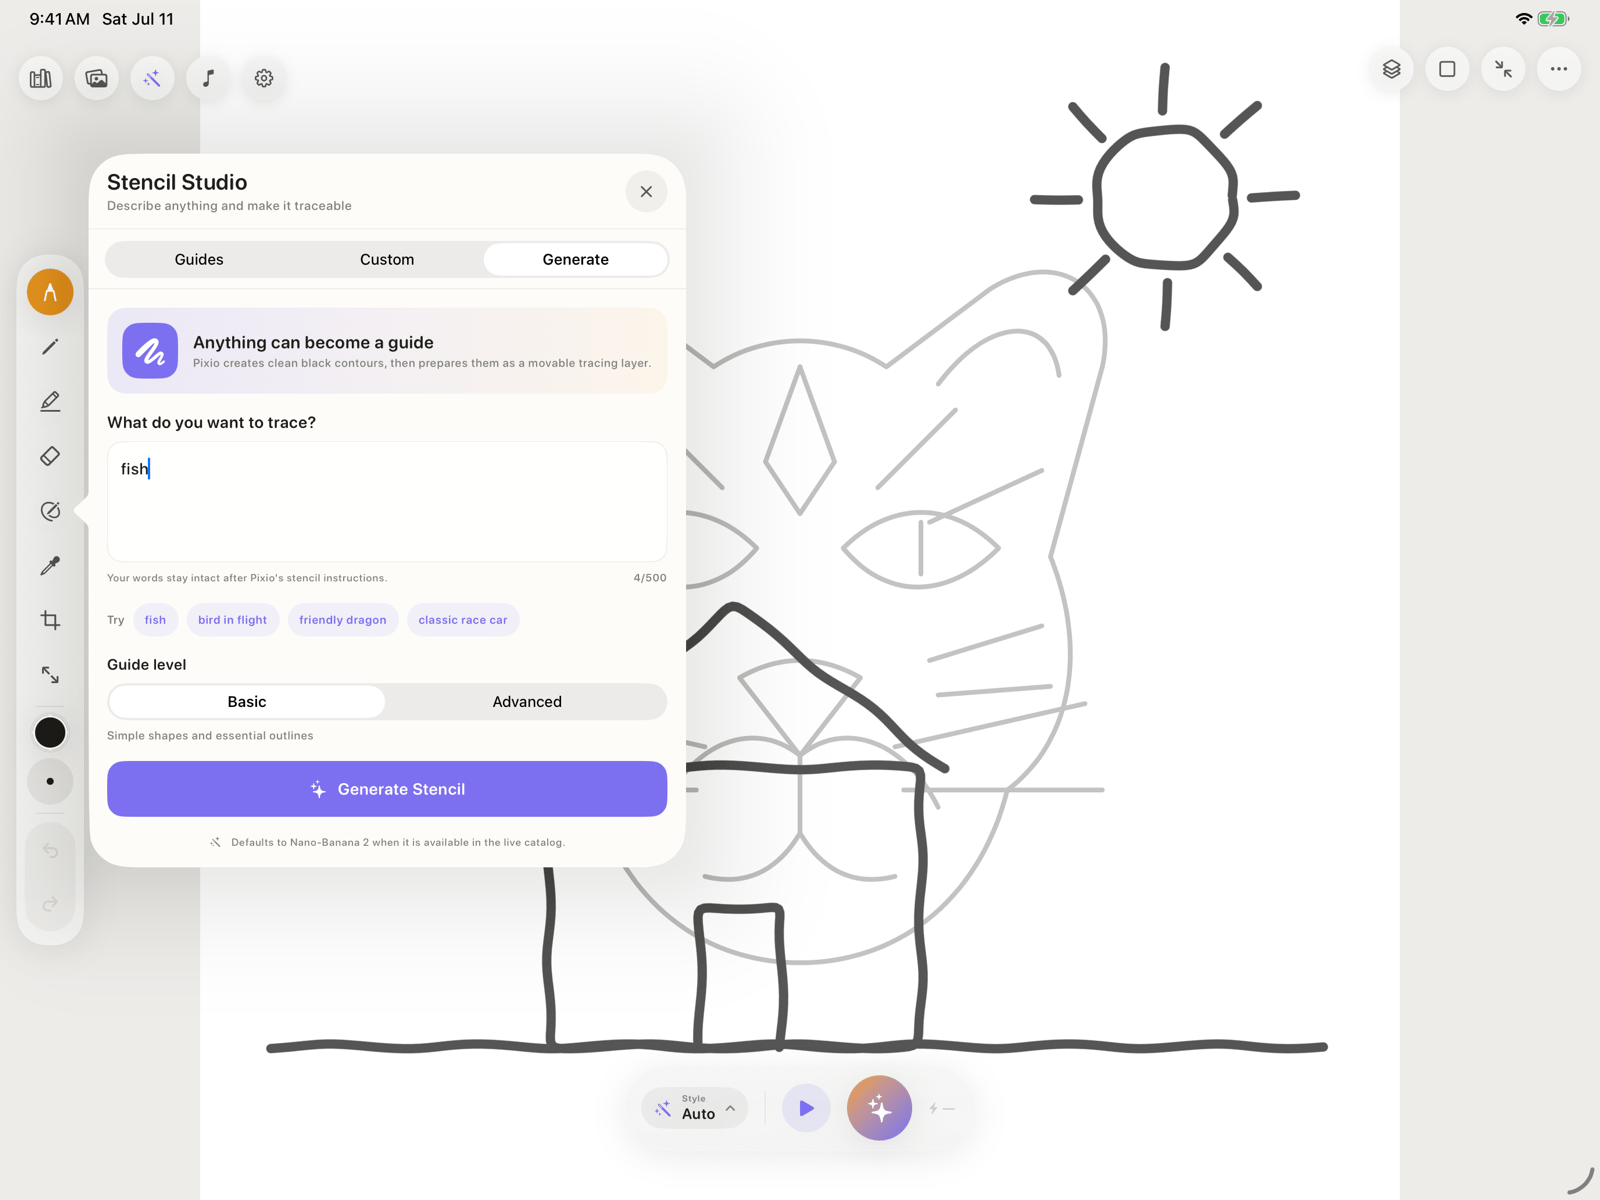 Pixio Canvas adds strict stencil instructions to your description so the model produces strong black contours on a white background. Auto prefers Nano-Banana 2 when it is available in the live model catalog and falls back to another compatible image model when needed.
Generated stencils require:
* Whisper or Duet rather than Quiet
* AI-processing permission
* Your Pixio API key
* Internet access and available Pixio credits
Preview the result before placing it. Name the result, then choose **Save Only** to keep it in Custom Stencils or **Save & Place** to save and add it to the canvas.
Photo-to-Stencil is local. Generate Stencil is an AI request: your description is sent through Pixio to the provider serving the selected model after you grant permission.
Pixio Canvas adds strict stencil instructions to your description so the model produces strong black contours on a white background. Auto prefers Nano-Banana 2 when it is available in the live model catalog and falls back to another compatible image model when needed.
Generated stencils require:
* Whisper or Duet rather than Quiet
* AI-processing permission
* Your Pixio API key
* Internet access and available Pixio credits
Preview the result before placing it. Name the result, then choose **Save Only** to keep it in Custom Stencils or **Save & Place** to save and add it to the canvas.
Photo-to-Stencil is local. Generate Stencil is an AI request: your description is sent through Pixio to the provider serving the selected model after you grant permission.