
FusionCraft: Blend Power and Precision in AI Image Creation
Overview
FusionCraft is a cutting-edge AI image generation platform built upon a finetune of the powerful Flux and Juggernaut models. It provides a versatile suite of specialized models, each optimized for different creative needs. Whether you require rapid image generation, high-quality outputs, photorealistic results, or precise inpainting capabilities, FusionCraft delivers exceptional performance and control.Specialized Models
Access models optimized for speed, quality, photo realism, and inpainting.
High-Quality Outputs
Generate visuals with exceptional detail and artistic fidelity.
Precise Inpainting
Modify specific masked areas of images with intelligent filling and blending.
Flexible Controls
Fine-tune your creations with various sliders and options.
Visual Showcase
Explore the diverse and high-quality outputs achievable with FusionCraft:Windy Hair
.png)
Medieval Planetarium
.png)
Vinyl Couch
.png)
Dias de los Muertos Parade
.png)
FusionCraft Models and Their Focus
FusionCraft offers a selection of models, each tailored for specific types of image generation:Fast (Free)
Fast (Free)
Optimized for speed, providing rapid image generation.
- Primary Use: Quick concept generation, rapid iteration.
- Available Tools: Generate, Redux
Balanced (5 Credits)
Balanced (5 Credits)
Offers a good balance between speed and quality.
- Primary Use: General purpose image generation, image-to-image transformations.
- Available Tools: Regular, Image to Image, Redux
Quality (10 Credits)
Quality (10 Credits)
Prioritizes high-quality outputs with greater detail and refinement.
- Primary Use: Professional-grade image generation, detailed visuals.
- Available Tools: Regular, Image to Image, Redux
Photo (10 Credits)
Photo (10 Credits)
Specialized for generating photorealistic images.
- Primary Use: Creating realistic portraits, landscapes, and scenes.
- Available Tools: Regular
Inpainting (10 Credits)
Inpainting (10 Credits)
Designed for modifying specific masked areas of an image.
- Primary Use: Removing objects, adding elements, fixing imperfections within an image.
- Available Tools: Inpainting
Understanding the Tools:
- Generate / Regular: Create images from a text prompt.
- Redux: Remix or modify existing images based on a prompt and an input image.
- Image to Image: Transform an input image based on a prompt and its visual content.
- Inpainting: Modify specific masked areas of an image based on a prompt and an input image with a mask.
Mastering Prompts for FusionCraft
Prompting in FusionCraft depends on the model and tool you select. Each model responds differently to prompt complexity and stylistic cues.General Prompting Principles:
Specificity is Key
Specificity is Key
Provide clear details about your desired image, especially for models like Quality and Photo. Describe subjects, actions, settings, styles, and mood.
Understand Tool Influence
Understand Tool Influence
Your prompt’s interpretation is heavily influenced by the selected tool. A prompt for “Generate” will be interpreted differently than the same prompt used with “Fill” or “Redux”.
Use Natural Language
Use Natural Language
Formulate your prompts using descriptive sentences.
Consider Negative Prompts
Consider Negative Prompts
Use the negative prompt field to steer the AI away from unwanted elements or artifacts.
Prompting for Specific Models/Tools:
Fast & Balanced
Fast & Balanced
These models often perform well with straightforward, clear prompts. Focus on the core subject and scene.
Example: “A cat sitting on a windowsill looking at the rain.”
Quality & Photo
Quality & Photo
These models benefit from more detailed and nuanced prompts, including specifics about lighting, camera style, and artistic details for higher fidelity.
Example: “A close-up portrait of an elderly person with kind eyes, soft studio lighting, shallow depth of field, shot on a vintage film camera.”
Inpainting
Inpainting
Describe what you want to appear within the masked area. Focus on the object or scene you want to generate and how it should blend with the existing image.
Example: (Mask over a blank wall) Prompt: “A vibrant graffiti mural covering the wall.”
Image to Image
Image to Image
Describe the desired transformation or style for the input image.
Example: (Input: Photo of a building) Prompt: “Turn this building into a stained glass window, vibrant colors, intricate patterns, glowing light.”
Redux
Redux
Describe the desired changes or the new style you want to apply to the input image, focusing on the elements you want to modify or replace.
Example: (Input: Photo of a person) Prompt: “Give them a superhero costume, red and blue, cape flowing in the wind.”
LoRAs (Photo & Inpainting)
LoRAs (Photo & Inpainting)
Include the LoRA’s specific trigger word in your prompt. Then, describe the scene or subject you want, incorporating the concept or style the LoRA was trained on.
Example: (Using a “fantasy creature” LoRA with trigger “mythicbeast”) Prompt: “A majestic mythicbeast perched on a cliff overlooking a misty valley.”
ControlNets
ControlNets
Your prompt describes the content and style of the image, while the ControlNet image provides the structure or composition. Ensure your prompt aligns with the structural guide provided by the ControlNet image.
Example: (ControlNet: Canny edges of a building) Prompt: “A beautiful watercolor painting of an ancient castle at sunset.” (The AI will generate a watercolor painting of a castle following the edge structure of your input image).
Reference Image (Custom Model)
Reference Image (Custom Model)
Describe the desired image, indicating how the AI should draw inspiration from the reference image(s). You can reference specific images if using multiple.
Example: (Reference Image 1: A character, Reference Image 2: A scene) Prompt: “Generate a portrait of the person from image1 standing in the setting from image2.”
Prompt Examples
Here are some examples showcasing prompting for different scenarios:How to Use FusionCraft
Embark on your creative journey with this general workflow:Select Your Model
Choose the FusionCraft model that best suits your needs (Fast, Balanced, Quality, Photo, Inpainting).
Upload Image (If Applicable)
If using the Balanced, Quality, or Inpainting models, upload the base image you want to work with. For Inpainting, you will also need to draw a mask on the uploaded image.
Provide Your Prompt
Enter your text description for the image you want to create or modify. Include trigger words if using LoRAs (Photo, Inpainting).
Adjust Settings
Configure common settings like Image Size/Aspect Ratio, Inference Steps, Guidance Scale, and Seed. Adjust model-specific options like Strength (Balanced, Quality, Inpainting), Photo LoRA Scale (Photo), or add LoRAs (Photo, Inpainting).
Generate Image
Click the “Generate” button and await your creation. Ensure you have enough credits if using a paid model.
Input Parameters and Options
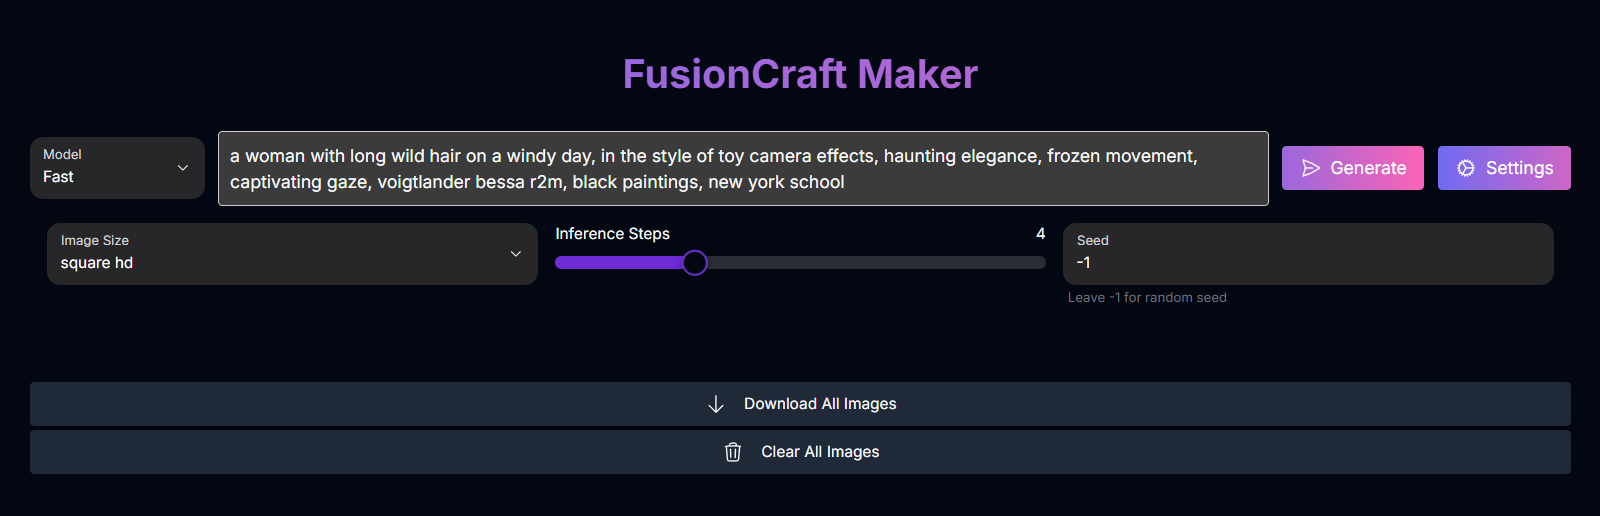
FusionCraft offers a wide array of input parameters to give you precise control over the image generation and modification process. The available parameters vary depending on the selected Model.Common Parameters (Available across multiple Models):
Your text description guiding the image creation or modification.
A text prompt specifying elements, styles, or characteristics to avoid in the generated or modified image.
The desired dimensions or aspect ratio for the output image. Can be selected from presets (e.g.,
square_hd, landscape_16_9) or specified with custom width and height. Specific options vary by model.Controls the detail and refinement of the image generation/modification process. Higher values generally result in more detailed outputs but may increase processing time.
Default: 4 (Fast), 28 (Balanced, Quality, Photo, Inpainting)
Range: 1-12 (Fast), 3-50 (Balanced, Quality, Photo, Inpainting)
A number that initializes the random generation process. Using the same seed with the same prompt and settings will produce a consistent result. Enter
-1 for a random seed.
Applies to: Fast, Balanced, Quality, Photo, InpaintingAdjusts how closely the AI adheres to your text prompt. Higher values result in outputs that stick more strictly to the prompt, while lower values allow for more creative variation.
Default: 3.5 (Balanced, Quality, Photo, Inpainting)
Range: 1-20 (Balanced, Quality, Photo, Inpainting)
Note: Not available for the Fast model.
The number of images to generate in a single batch. (Default: 1).
Applies to: All models.
The file format for the generated image.
Default:
jpeg
Possible enum values: jpeg, png
Applies to: Photo, Inpainting.Model-Specific Parameters:
Image Upload
Image Upload
Applies to: Balanced, Quality, Inpainting
The URL of the input image file to be used for Image-to-Image or Inpainting.
Strength
Strength
Applies to: Balanced, Quality, Inpainting
Controls the strength of the transformation from the original image (Image-to-Image, Inpainting). Higher values result in more significant changes, while lower values retain more of the original image’s structure/colors.
Default: 0.85
Range: 0.01 - 0.99
Photo LoRA Scale
Photo LoRA Scale
Applies to: Photo
Controls the influence of a specific internal LoRA used by the Photo model.
Default: 0.75
Range: (Likely similar to other scales, e.g., 0-2).
LoRAs
LoRAs
Mask Image
Mask Image
Applies to: Inpainting
The URL of the mask image defining the area to be filled or inpainted. This is created using the built-in mask editor.
Tips for Best Results
Choose the Right Model
Select the model that aligns with your primary goal (speed, balance, quality, photo realism, or editing).
Master Prompting for Your Model
Tailor your prompt detail and style based on the selected model’s strengths.
Use High-Quality Input Images
For models requiring image uploads (Balanced, Quality, Inpainting), start with clear, high-resolution images.
Experiment with Settings
Adjust Inference Steps, Guidance Scale, and Strength (where applicable) to find the perfect balance for your vision.
Leverage LoRAs
For Photo and Inpainting models, experiment with LoRAs to add specific styles or elements.
Precise Masking
When using the Inpainting tool, take care to draw your mask accurately over the area you want to modify.