
Image to Vector: Transform Raster to Scalable Graphics
Overview
Image to Vector is a powerful tool that converts raster image formats (like PNG, JPG) into vector graphics (like SVG). Unlike raster images, which are made up of pixels and can lose quality when scaled, vector graphics are composed of paths, lines, and curves defined by mathematical equations. This means they can be scaled infinitely without losing sharpness or detail. This tool is invaluable for graphic designers, web developers, and anyone needing scalable graphics for logos, illustrations, or web assets.Scalable Output
Convert to SVG format that can be scaled infinitely without quality loss.
Detail Preservation
Retain clarity and sharpness even at large sizes.
Customizable Conversion
Fine-tune the vectorization process with various modes and sliders.
Easy Workflow
Simple process to upload, convert, and download.
How to Use Image to Vector
Follow these steps to convert your raster image into a vector graphic:Upload Your Image
Click the “Choose File” button to upload the raster image file (e.g., PNG, JPG) you want to convert to SVG.
Configure Settings (Optional)
Adjust the various dropdown menus and sliders to fine-tune how the image is vectorized.
See the “Input Parameters and Options” section below for a detailed description of each setting. Experimentation is key to finding the best result for your specific image.
Convert to SVG
Click the “Convert to SVG” button. The tool will process your image based on the selected settings and generate the vector version.
Input Parameters and Options
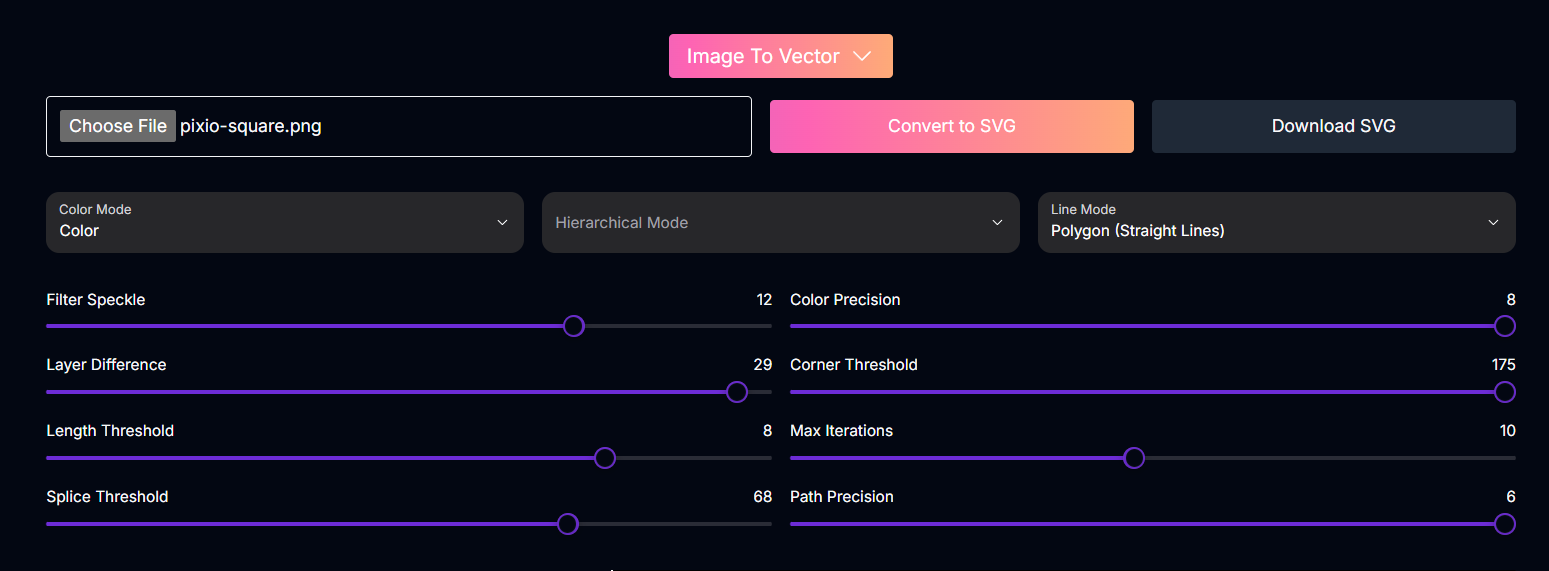
Here are the inputs and options available to customize the image-to-vector conversion:The raster image file (PNG, JPG, etc.) you want to convert.
Determines how colors are handled during vectorization.Possible values:
Color, Black & WhiteControls the layering and structure of the vector output.Possible values:
Stacked, CutoutSpecifies how lines and shapes are represented in the vector output.Possible values:
Polygon (Straight Lines), Spline (Curved Lines)Adjusts the sensitivity to small details or “speckles” in the image. Higher values ignore smaller details, simplifying the output.
Influences how distinct color or tonal areas are treated as separate layers in the vector output.
Sets a minimum length for vector paths. Shorter paths below this threshold may be ignored.
Affects how curves are simplified or “spliced” into straighter segments.
Controls the number of colors or tonal variations preserved in the vector output. Higher values retain more color detail.
Determines how sharp corners are detected and represented. Lower values are more sensitive to subtle corners.
Sets the maximum number of processing iterations the algorithm performs to optimize the vector paths.
Controls the smoothness and accuracy of the vector paths relative to the original image’s edges. Higher values create more precise paths.
Tips for Best Results
Use Graphics with Flat Colors
The tool works best with images that have flat, distinct color areas and clear edges, like logos, icons, and simple illustrations.
Iterate on Sliders
Experiment extensively with the various slider settings. Small adjustments can significantly impact the final SVG output.
Understand Each Setting
Refer to the parameter descriptions to understand how each slider and dropdown affects the vectorization process.
Compare Outputs
Generate multiple versions with different settings and compare them to find the one that best captures the detail and style of your original image.